eclectic design inspiration

Showing posts with label fashion. Show all posts

Monday, October 29, 2012

And now I have the travel bug...

Never has a house tour made me want to pack up my bags, grab my passport and totally peace out more than this one. Featured on Design*Sponge, it is the Soho, Manhattan home of twin sisters Lizzie and Kathryn Fortunato, of the incredible accessories brand Lizzie Fortunato. I admit I had never heard of these two talents before, but now I am daydreaming about owning every single thing in their collection, especially this little duo. And just as their world travels have clearly influenced the colors, textures and shapes of their jewelry, the same kind of style is found all over their home. And I am in love! Below are some of my favorite shots from the house tour, but make sure to check out this Design*Sponge post to hear the details behind all of their treasures.


Fabulous, no?

Have any of your travels influenced the look of your home?

Thursday, October 4, 2012

Latest Inspiration

I have a lot of catching up to do since blogging has taken the backseat to this other project I'm working on that I will finally be sharing with the world minus my mom on Monday. I am SO excited. I can be a bit of perfectionist with the things I really care about (as I'm sure many of you are) and so it's taking way longer than I would like it to. But it's getting soclose.

I'm also really looking forward to getting back into my groove and spending Sunday morning at my favorite bakery, chocolate croissant and latte in hand as I read through all of the wonderful blogs that I have been neglecting recently. I can't wait to see all of your latest visual inspiration, read your creative short stories, find out what food you have been enjoying (does anyone not blog about food?), and learn about the home projects you've been spending time on. I get so much inspiration and enjoyment from the blogging community and can't wait to be 100% involved again.

Until then, here is some of my favorite inspiration from all over the web... (and if you are active on Pinterest I am a bit of a pinning psycho and would love to connect on there. Heehee. Find me here)


this pretty living room via House Beautiful's Pinterest account

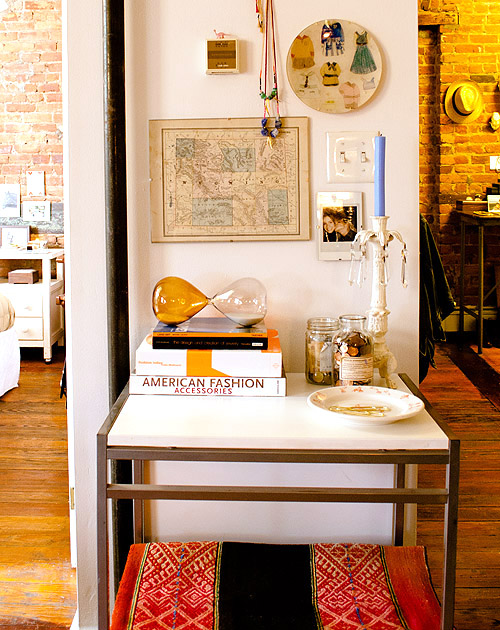
this very cool entry table (loving the polaroids) via Design Sponge

the cool-as-it-is-cute style of Miroslava Duma, former editor of Harper's Bazaar Russia
(if you search for her on Pinterest you will not be disappointed)

this elegant but cozy bedroom featured on Glitter Guide

this eclectic, treasure-filled vignette via Design Sponge

this fantastic combo of leopard and grey via Lauren Santo Domingo's Pinterest boards

this incredible bathroom via Gild & Grace, one of my very-favorite interior design blogs.
Constant eye candy.

this great mixed-style living room in San Francisco via Apartment Therapy

this Oscar de la Renta NYFW runway look (actually the entire RTW collection - trust) via vogue.com

this perfectly rustic bathroom via Apartment Therapy

this ultra-glam living room featured on Vogue's APT with LSD


What do you have planned for the weekend? And give a girl some tips: how do you successfully stay on top of blogging? I need to knoooooow ;)

Friday, August 31, 2012

DIY: Jewelry Organizer


A couple of weekends ago I stumbled upon a $25 gift card to Forever 21 that I'd never used, so I headed to the mall to do a little outfit shopping for a wedding I was going to later that evening. I decided to let myself spend the whole thing on jewelry - guaranteed I'd walk out of that store with multiple options for the night. Well, $52 (obviously not the plan) and about 20 minutes later, I exited the mall with three necklaces, one bracelet, four pairs of earrings and two rings. I was so happy.

When I got home, however, I was disappointed to find my precious jewelry all tangled up in its little yellow plastic bag and I knew it would only get worse after it found its place in my "jewelry pouch." The makeup bag that I use to store my jewelry is where most necklaces, rings and earrings go to die because I forget about them or am too rushed to untangle them before I head out the door. Can you relate? I basically have two pairs of earrings and one bracelet on heavy rotation, but I have lots of other worthy jewelry that deserves its time in the spotlight as well. I'm not trying to go all Toy Story with this post I promise...

The next day I decided to come up with some kind of organization system that would keep my jewelry accessible and out of harm's way. And because I think jewelry is pretty (and my closet is just way too damn packed with stuff to do anything there) I started thinking about ways I could display it attractively in my room. There were many options, but I decided to go with an idea I had seen on Pinterest... perhaps you've seen it?


originally from Better Homes & Gardens

Now, truth be told I don't take on DIYs too often and I pretty much despise anything that involves using a drill, so I will probably never get my own show on HGTV. This particular project came with swearing, sweat, phone calls to my mom, and near give-up moments, but in the end I completed the project and I'm really glad I did. (Don't be scared, keep reading...)

Because I wasn't following any kind of directions and just sort of figured it out as I went along, there are many things I would do differently if I repeated the project (#1 being: make sure you have a drill bit). So, that's the version you'll be getting below. I believe that this is a pretty simple DIY and with a little effort, anyone can do it. If you are good with a drill, this will be a piece of cake.

And please don't get too annoyed with me if I over-explain. I have a degree in Elementary Education and that communication style has unfortunately stuck with me...


First, your materials and tools:

Rectangular piece of plywood - I got mine for $0.51 from Home Depot's wood scraps and it measured 24" by 28" and was a little less than 1" thick.

Sandpaper - (only if the plywood needs to be smoothed down)

Burlap - Enough to fold in half, cover the front side of the board, and staple in the back. I got 2 yards to be on the safe side, and had lots of extra.

Hardware - Drawer knobs, drawer pulls, hooks, etc. that you will be hanging your jewelry on. You might want to draw out what you want the board to look like so you know how many of each kind to get, or you can just lay it out at the hardware store and see what you like. I ended up choosing 5 pulls, 5 knobs, and 2 hooks. If I did it again, I'd get a couple pulls that are pocket shaped, like in the photo from Pinterest, to put stud earrings in.

Staple gun and staples

Power drill

Drill bit - Choose one that is the same size in diameter as the bolts that came with your hardware. This is the one tool that I did not have during this project, and as a result, it became way more complicated than it needed to be.

Screwdriver - You may not end up using it

Ribbons - Two ribbons, one wider than the other and in different colors, long enough to wrap around the front of the board and staple in the back

Picture Hanging Materials - Brackets, hooks, wire to hang the board on the wall

Pencil

And then this is what you're going to do:

1. Use the sandpaper to smooth the plywood edges and corners if necessary. Then, with the board on the ground, lay out where you want to put all of the various pieces of hardware. Keep in mind what you will probably hang from each one (earrings, long necklaces, etc.) and space accordingly. 


2. With the hardware in final place, use your pencil to mark the bolt holes for each piece so you know where to drill. For pieces of hardware that have two bolt holes, mark the two holes but just drill one of them.

3. Wrap the burlap in two layers around the the side of the board that you did not mark and staple gun it to the back (marked side), stapling about every two inches. Pull at the burlap with one hand as you staple with the other so that the material lays smoothly on the front side.

After this photo I was about to throw the drill out the window so I was over taking pictures. Sorry!

4. Take the bolts from the hardware and match them with the correct bolt holes in the board. Use the screwdriver or power drill to screw in the bolts so that they poke through the burlap on the other side. You will need to prop the board up from the ground (I used yoga blocks) so you don't drill into the floor.

5. Flip the board over and carefully push the burlap down around the tips of the bolts so that you can screw the hardware on tightly. Then one by one, twist on your hardware.

6. Finally, wrap the larger ribbon across the top of the board and staple to the back. Then wrap the smaller ribbon around the board so that it lays on top of the larger ribbon and staple to the back. Attach your hanging hardware to the back of the board and hang on the wall.

Finished! Now the fun part is hanging your jewelry...


Do you have a favorite way to organize your jewelry? And more importantly - are you doing anything fun for Labor Day weekend? I'm going camping for two nights with a big group of friends and seriously CANNOT WAIT! :) Have a good one!

Sunday, August 26, 2012

Always Believe

Happy Monday! I hope everyone had a great weekend. Here's a little inspiration for the start of the week...

via Pinterest

I don't know about you, but I fully believe in the power of positive thinking. I'm a sucker for books like The Secret and A New Earth and have found myself spending way too much time on the New Age self-help aisle at Powell's Bookstore. I blame Oprah. 

But, have you ever experienced the saying, "when it rains it pours?" For me it really does, and it's one of the most startling realizations I've made about life. I am convinced that attitude has almost everything to do with it, so when things start to go wrong, I find myself doing everything I can to turn my frown upside down before I find myself with even more trouble. Mocha Coconut Frappuccinos and a look at Pinterest's humor section (my new nightly bedtime routine) usually do the trick. 

In the same vein, one of the most rewarding practices I've discovered is keeping a daily Gratitude Journal. I learned about it from Oprah, of course, and it involves writing down 5 things I am thankful for that happened during the day - so simple. Many people do this when they say prayers, but I've found that writing it down really helps it to sink in. When I keep the journal regularly, my mindset is really affected and I am constantly recognizing the many blessings I experience every single day. Even if it's The Worst Day I can always come up with 5 things to be thankful for, it might just take a little longer. So, if you are looking for a little pick-me-up in the mood department, I totally recommend keeping a Gratitude Journal, I guarantee it will make a difference. Now I promise I'm done with the new agey talk...

I've been avoiding the fact that I haven't blogged in a week (I blame Oprah summer), so here's a little catch-up with some of my recent favorite things:

this wonderfully eccentric living room via Bright Bazaar

this Balmain dress of my dreams via Fashion Gone Rogue

this eye-catching sitting area via The Decorista

this beautiful antique bureau via Design Sponge

the ultimate (Dior) party via Kerrin Palooza

this oddly perfect wall art via Design Sponge

and from the same home, this very sweet bedroom 

this dripping-with-cool lounge area via A Note On Design

And to get us back to where this post started... guaranteed this Victorian film strip will have an effect on your mood :) Have a great Monday!

(one of my favorite Pinterest finds) via


What daily practices or quick fixes have you found to transform your mood?

Monday, June 25, 2012

Week 24-25: Don't Miss 'Ems!

Wow what a weekend it's been! (For the sake of being on top of this blog, let's pretend it's still Sunday.) First of all.... my sister is getting married!!! Her boyfriend popped the question on Saturday and it's been non-stop phone conversations, and smiles, and Pinteresting, and teary eyes, and texts with the fam and friends ever since. Maid of Honor, right here!

On top of that, I've been trying to get all of my ducks in a row for a long anticipated girls' trip to San Francisco! The five-day funfest begins on Wednesday, so if you have any recommendations of where to go or what to do, please let me know! I haven't been to SF since a family trip in 8th grade and I sort of want to see and do everything. (Except Alcatraz...   just sayin')

And before it gets too far away from me, a wrap up of my favorite things over the past couple of weeks from the blogosphere:

This photo accompanying one of the best interviews I've ever read, of food/travel writer and stylist David Prior, by The Design Files

This kooky but oh-so-fun Queen Elizabeth's Dress Hues Pantone Color Wheel via Design for Mankind on Yatzer.com

Chloe Sevigny's currently-on-the-market house tour via The Aestate

A nice-looking way to hang organize via Affaire With Interiors

DIY Gold Tube Bracelets by Honestly...WTF

This lovely tour of Jessica Comingore's eclectic home via Design*Sponge

This jaw-dropping NYC rooftop via Gild and Grace

This cute and playful bathing suit on Elsa Hosk via Oracle Fox

An airy and bright dining area via Gild and Grace

These simple succulents in such elegant silver goblets via My Design Ethos

This stunning beach photography by Massimo Vitali featured on The Aestate

A ridiculously creative bedside table via The Decorista

 This sassy stripe ensemble via Look Closer

This super-stylish living room via Apartment 34

Everything about this look on Oracle Fox's Mandy Shadforth

A delightfully charming office space via Five Kinds of Happy

This standout look worn by my girl crush Taylor Tomasi Hill via Because I'm Addicted

This adorable "Save the Date" by Souther Fried Paper (favorite business name ever

This does-it-get-any-better? kind of room via The Decorista


Which of these images has you most inspired?

And more importantly, what is your must-see, must-do, must-eat, must-shop in San Francisco!? 
I need tips!!